Katana Rebuild project - page 2..
next I needed to get myself an offset sprocket for the chain to clear the (wider than stock) 170-section tyre..
because I think the offset sprockets that are on offer are way overpriced I decided to make my own..
well, this is what I've ended up with:
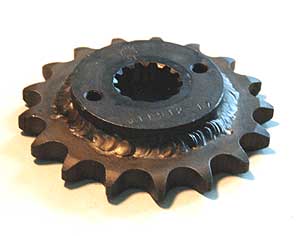
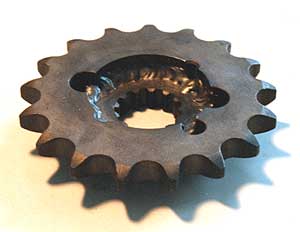
..first I took the center of an old sprocket (which I had lying around) and bolted that onto a spare output shaft alongside a new sprocket..
had them welded together lined up exactly spot on because of the shaft which I removed to have the center of the new sprocket milled out..
after that I went back to the welder one last time to also have the inside welded..
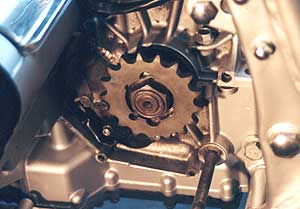
..as mounted on the kat.. for less than half the cost of a "real" offset sprocket!
next I'm going to grind the stock nut taking away the "locking" part of it enabling me to fit a seperate locking nut instead.. (more secure than the stock locking tab which also is a pain to remove)
..what next?
right.. here's my homemade camchaintensioner! :
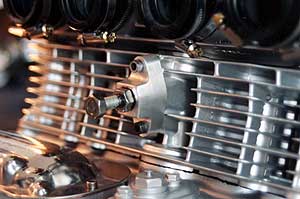
..basically it's just a piece of ally with M10 threads and a big bolt bolted to the cylinderblock in place of the old tensioner..
a nut for locking the bolt and an o-ring to prevent leaks..
..the finishing and fitting exhaust system was next:
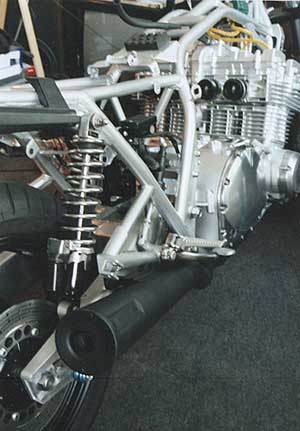
..used some sections of ally scaffolding tube to take up the extra space between the headers and the exhaust ports..
so they're now exactly centered which is nice..
..still have to stick on the Kerker shield off an old can to perfect the megaphone imitation.. (no budget for the real thing)
I'm a bit worried about the noise level it'll probably produce.. (well, we can always cut it off later and fit another can..)
right.. I noticed the fitting of the top yoke on the steering stem is very loose.. on my GSX I have the exact same problem so I decided to solve it on the kat straight away:
..I added a bolt by which I can now tighten up the fit of the stem.. cut the gap needed for adjustment with a hacksaw starting from the hole..
a nut is fitted in a cavity at the underside of the yoke..
tightened it up and it actually works!
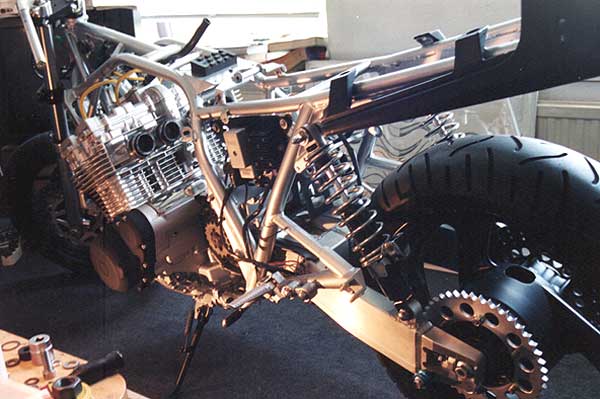
well.. just one last view from behind to conclude this episode.. ;-)
next up will be getting the wiring cleaned up and plugged in.. (already fitted the carbs in the meantime)
AND.. at last the big moment: trying to fire up the engine for the first time!
..missed the beginning of the project? ..go back to part 1
next I needed to get myself an offset sprocket for the chain to clear the (wider than stock) 170-section tyre..
because I think the offset sprockets that are on offer are way overpriced I decided to make my own..
well, this is what I've ended up with:
..first I took the center of an old sprocket (which I had lying around) and bolted that onto a spare output shaft alongside a new sprocket..
had them welded together lined up exactly spot on because of the shaft which I removed to have the center of the new sprocket milled out..
after that I went back to the welder one last time to also have the inside welded..
..as mounted on the kat.. for less than half the cost of a "real" offset sprocket!
next I'm going to grind the stock nut taking away the "locking" part of it enabling me to fit a seperate locking nut instead.. (more secure than the stock locking tab which also is a pain to remove)
..what next?
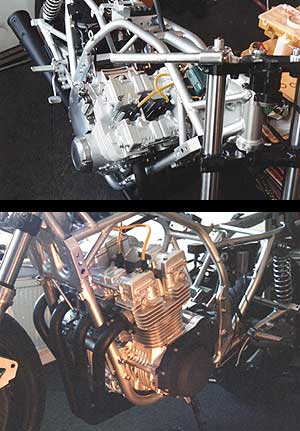
right.. here's my homemade camchaintensioner! :
..basically it's just a piece of ally with M10 threads and a big bolt bolted to the cylinderblock in place of the old tensioner..
a nut for locking the bolt and an o-ring to prevent leaks..
..the finishing and fitting exhaust system was next:
..used some sections of ally scaffolding tube to take up the extra space between the headers and the exhaust ports..
so they're now exactly centered which is nice..
..still have to stick on the Kerker shield off an old can to perfect the megaphone imitation.. (no budget for the real thing)
I'm a bit worried about the noise level it'll probably produce.. (well, we can always cut it off later and fit another can..)
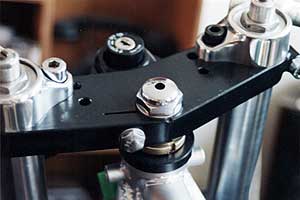
right.. I noticed the fitting of the top yoke on the steering stem is very loose.. on my GSX I have the exact same problem so I decided to solve it on the kat straight away:
..I added a bolt by which I can now tighten up the fit of the stem.. cut the gap needed for adjustment with a hacksaw starting from the hole..
a nut is fitted in a cavity at the underside of the yoke..
tightened it up and it actually works!
well.. just one last view from behind to conclude this episode.. ;-)
next up will be getting the wiring cleaned up and plugged in.. (already fitted the carbs in the meantime)
AND.. at last the big moment: trying to fire up the engine for the first time!
..missed the beginning of the project? ..go back to part 1
Copyright ©2026 Arnout's motorbike www.GSX1100.com